You want to be effective in digital ministry. Set SMART goals. (Specific, Measurable, Achievable, Relevant and Timely).
How to create a persona, based on research, educated assumptions, and real experiences. to help you in digital ministry.
Best practices and key tips as you get started in the world of social media for ministry.
A content journey is taking your user through a digital journey, step-by-step, going from one call to action (CTA) to another.
Analytics can help you see where God is at work in people’s lives online, and evaluate the effectiveness of your digital efforts.
Final instructions for a new digital strategist.
This section provides training and resources to help you grow in your marketing capabilities.
Find playbooks for using and leading with analytics, webinars, and step-by-step guides for using our Cru analytics tools.
Find training and how-tos for managing your social media channels as well as running social media campaigns.
Find helpful resources to help you get started with Adobe Campaign and to run your first email campaign.
Cru supports two content management systems that can host your website: Adobe Experience Manager (AEM) and WordPress.
Find helpful resources to help you get started with the right Learning Management System (LMS) to fit your training needs.
Worksheets and diagrams to help you plan your strategy
What does THAT mean? Find the answer here!
Directory of the supported apps and sites we use for ministry
The Title component can be used several different ways. In an article, the Title is configured to automatically show up as an H1 Header. If you do not know what H1-H6 in regards to headers is referencing, please check out this blog post.
When adding a Title component to a page, it will automatically take the words from what you’ve named the title when creating the page and it defaults to an H1 tag. The editable parts of a title component are the Name, Size, and whether or not the words link somewhere else.
Let’s go through the steps of adding a title component to your page:
Either look through the list of components on the side rail, oor click on the “Drag components here” section and click the plus icon.
Insert the Title component
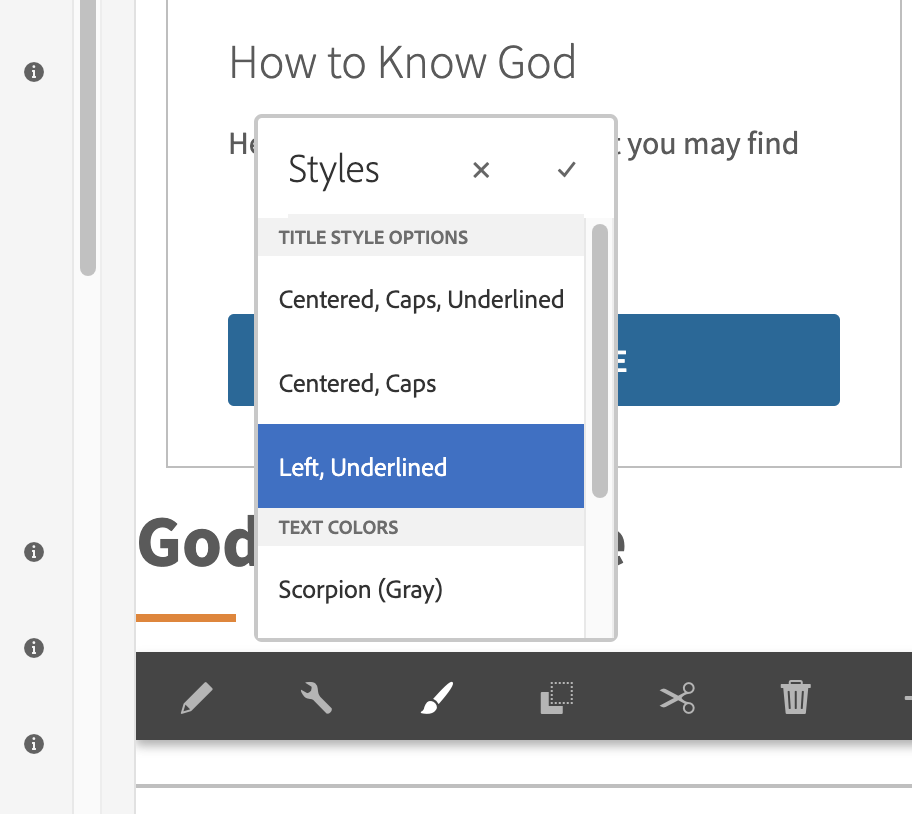
You’ll notice that there is a paintbrush icon on my screenshot. If you using a compatible template, you can configure the different style options available…
Current list of styles on the component:
Centered, caps, underlined
Centered, caps
Left Underlined
Scorpion Grey (color)
White (colo)
Gargantuan 6rem (size)
2. Opening the Configure options for the component will bring you to a menu with the few options mentioned earlier.
Below is the Title component with the Left Underlined style attached to it
©1994-2022 Cru. All Rights Reserved.