In order to add video to your page, there are several different components that may fit your needs. The recommended component for all videos that are in the DAM (Digital Asset Management) is the “Dynamic Media” component.
Use the Dynamic Media component to add dynamic video to your web pages. When you edit the component you can choose to use a predefined video viewer preset for playing the video on the page.
If the video is too large (>2GB), it will not render correctly on the page with a Dynamic Media component. That is because you will need to use a different component with the Embed code of the video itself, primarily an “HTML Source” component.
Currently, the only thing you need to configure when utilizing a Dynamic Media component, is the video you want to use itself.
Here are the steps taken to add a video to a web page using a Dynamic Media component
Make sure you have an Edge-to-Edge container already in the content tree. If not, put one on the page.
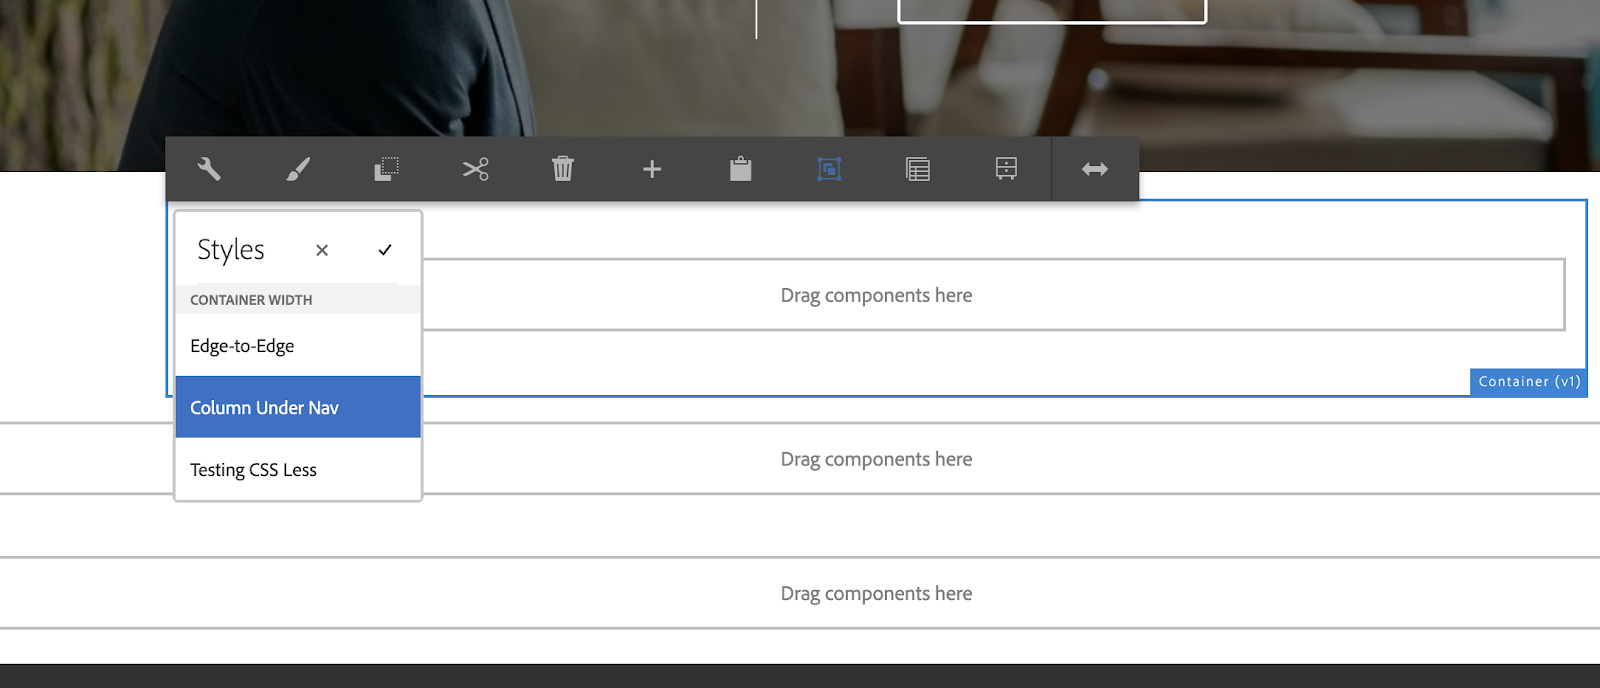
Create a container within that Edge-to-Edge container, and select the style “Column Under Nav”
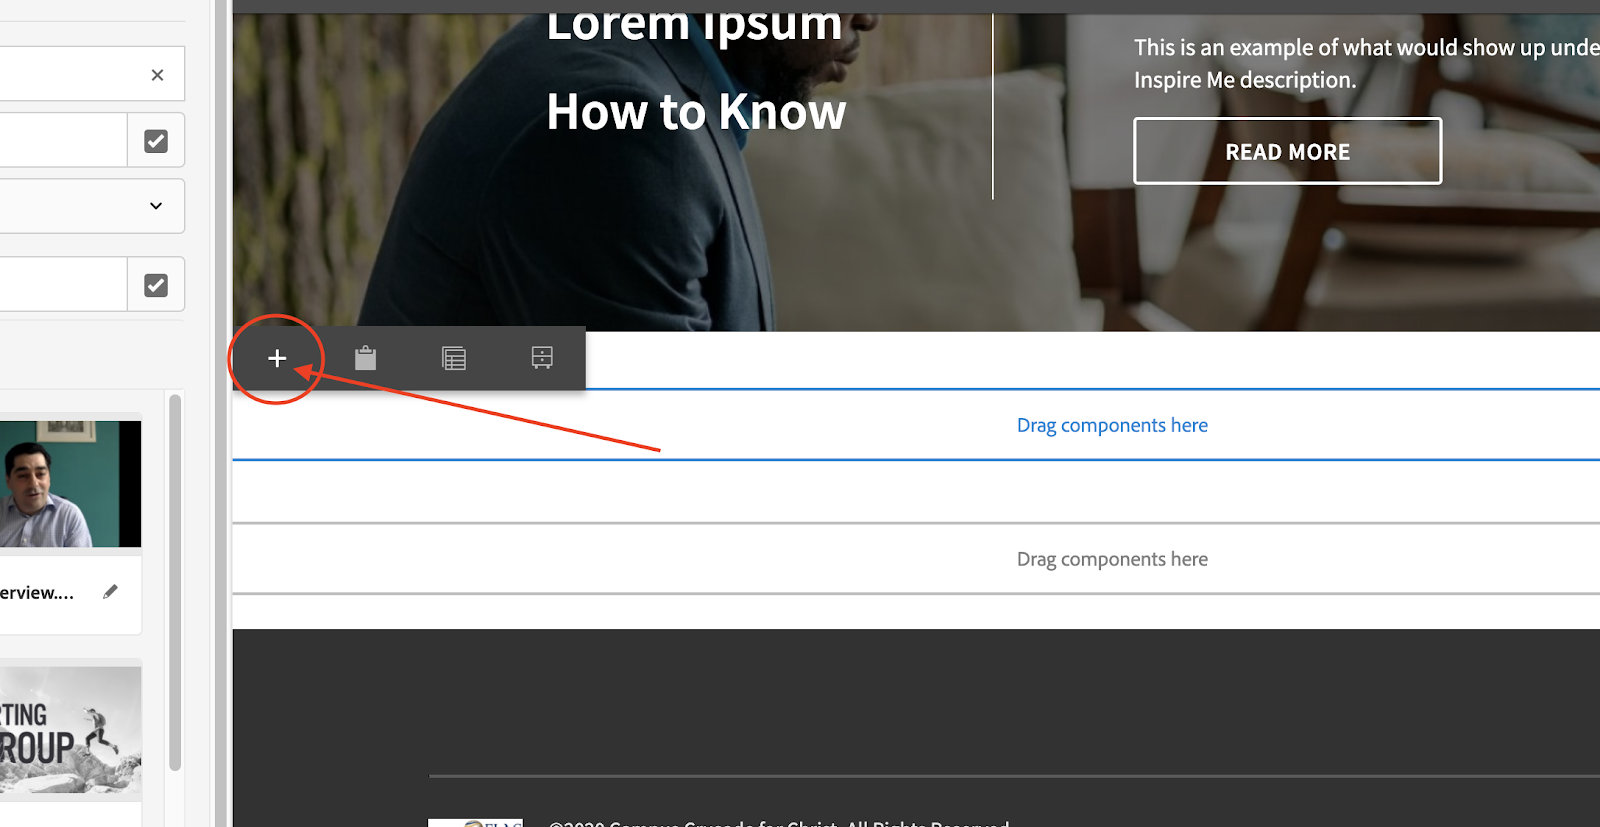
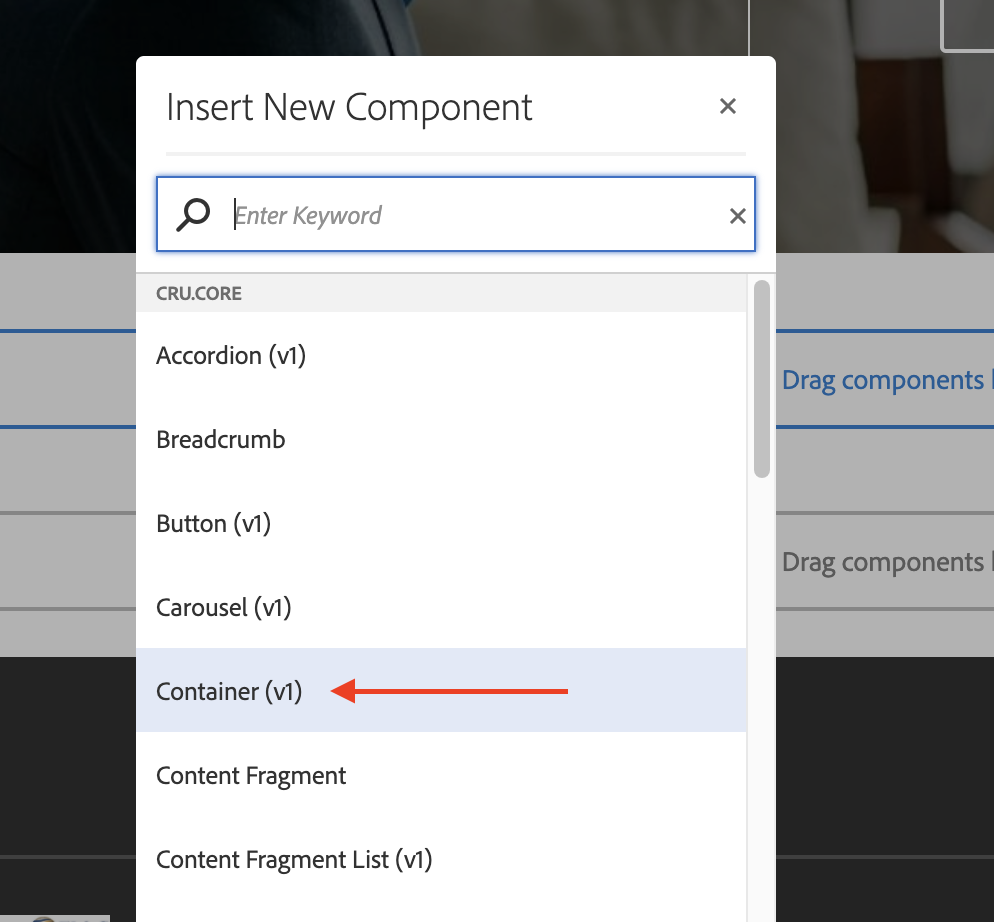
Insert Component
Select the Container component
Make sure the recently added container has the correct style
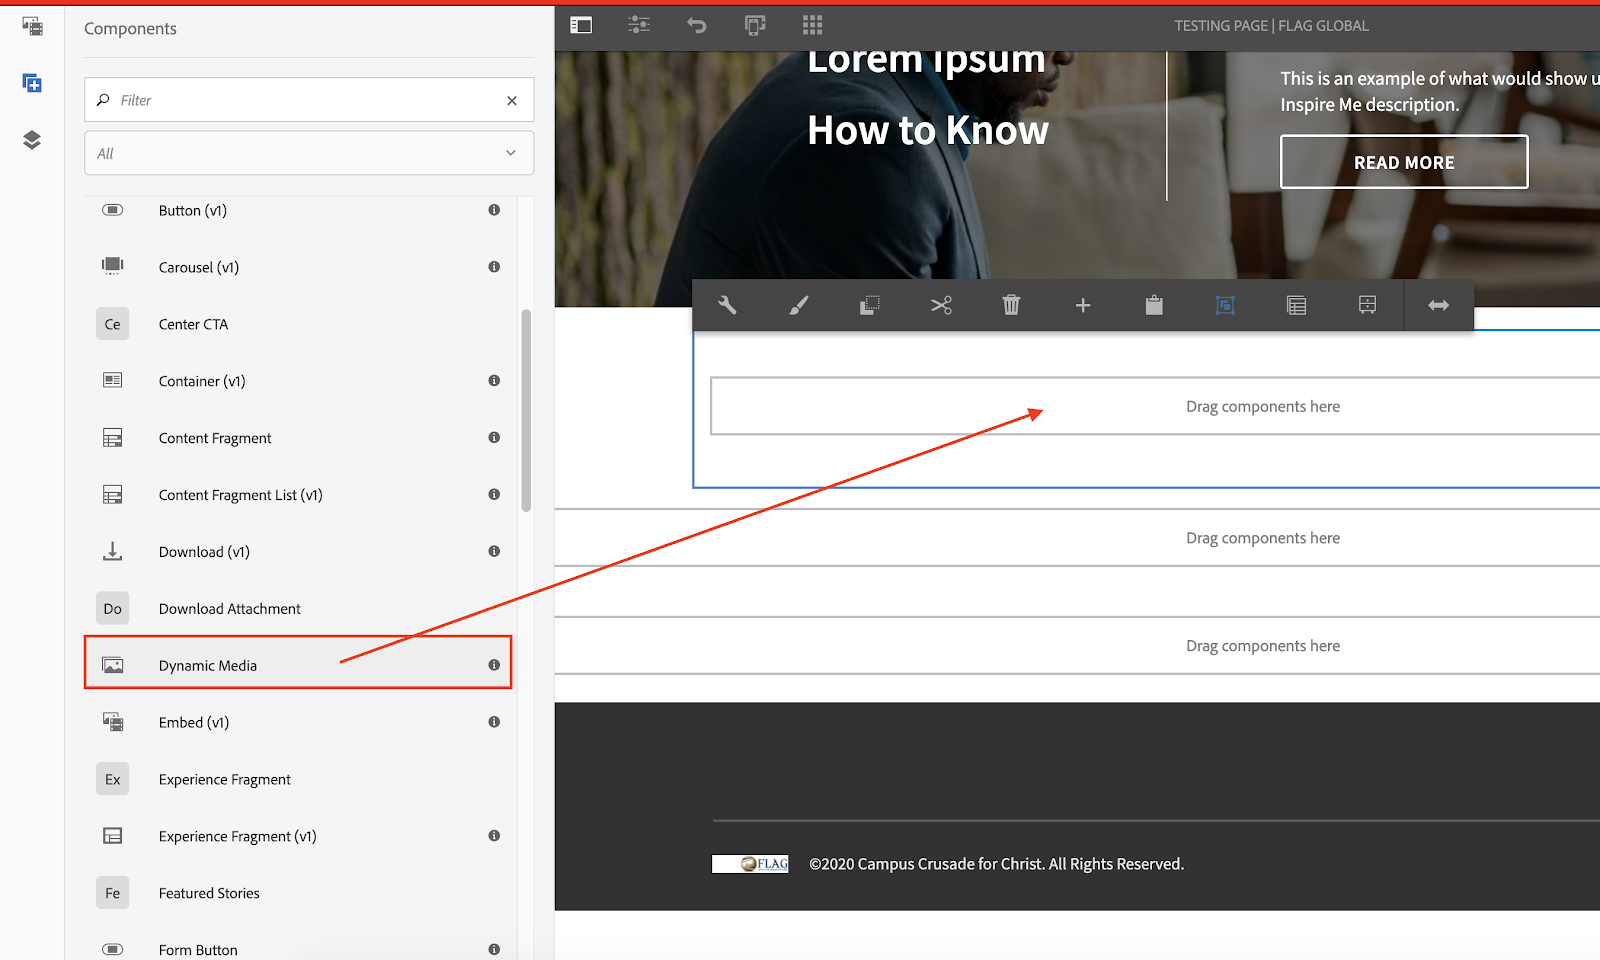
3. Once that container has been set on the page, you are ready to add the Dynamic Media component to it. You can use the same method as above, or you can drag it from the side-rail where all the components are listed.
Once that is completed, the structure within the system should look like this
4. Go into the asset rail, and make sure that you have the video asset type selected. This side rail is where you will select the video to drag onto the component. It’s also important for you to select the path, that way your video doesn’t get lost amongst the many videos in the system. Normally, we don’t get many videos uploaded to the DAM so you may find that your recently uploaded video is the first asset showing in the video section. If that is the case, do not worry about entering in a custom path.
5. As an example, I will drag the first video over to the dynamic media component and show you the final result
As you can see, a video is now associated with the Dynamic Media component. Always make sure you test the page by clicking “View as Published”, because there is potential for the video to render incorrectly on the published instance. If that is the case, reach out to aem@cru.org and we will further assist you with the issue.
©1994-2022 Cru. All Rights Reserved.