You want to be effective in digital ministry. Set SMART goals. (Specific, Measurable, Achievable, Relevant and Timely).
How to create a persona, based on research, educated assumptions, and real experiences. to help you in digital ministry.
Best practices and key tips as you get started in the world of social media for ministry.
A content journey is taking your user through a digital journey, step-by-step, going from one call to action (CTA) to another.
Analytics can help you see where God is at work in people’s lives online, and evaluate the effectiveness of your digital efforts.
Final instructions for a new digital strategist.
This section provides training and resources to help you grow in your marketing capabilities.
Find playbooks for using and leading with analytics, webinars, and step-by-step guides for using our Cru analytics tools.
Find training and how-tos for managing your social media channels as well as running social media campaigns.
Find helpful resources to help you get started with Adobe Campaign and to run your first email campaign.
Cru supports two content management systems that can host your website: Adobe Experience Manager (AEM) and WordPress.
Find helpful resources to help you get started with the right Learning Management System (LMS) to fit your training needs.
Worksheets and diagrams to help you plan your strategy
What does THAT mean? Find the answer here!
Directory of the supported apps and sites we use for ministry
The Image component is basically just that; a way for authors to put an image on a page. Some components may have the ability to add an image to them, whereas the purpose of this component is to JUST be an image. It is recommended that you utilize “container” components to put the Image component inside of a container. You may know that there is a ‘layout’ option for each component. However, not every component is configured to allow different layouts.
Use all lowercase characters -- no capitalization please -- and numbers
Instead of spaces, use hyphens
Instead of underscores, use hyphens
Do not use special characters like apostrophes, quotes, etc.
The only period "." should be before the file extension (e.g.: my-great-picture.gif but NOT my.great.picture.gif)
Image size for full width hero images- 2880x800
Image Ratio - 16:9 for standard tiles, and main article images, slightly less than 16:9 for full width blade components
Make use of sub-folders within Assets, as they help organize your content
If you can’t find one that fits your need, make a new sub-folder
To get around this, you’ll want to use the “Edge-to-Edge” style for a container, and then change the layout, which will allow you to adjust the width of the container, and effectively everything inside of the container.
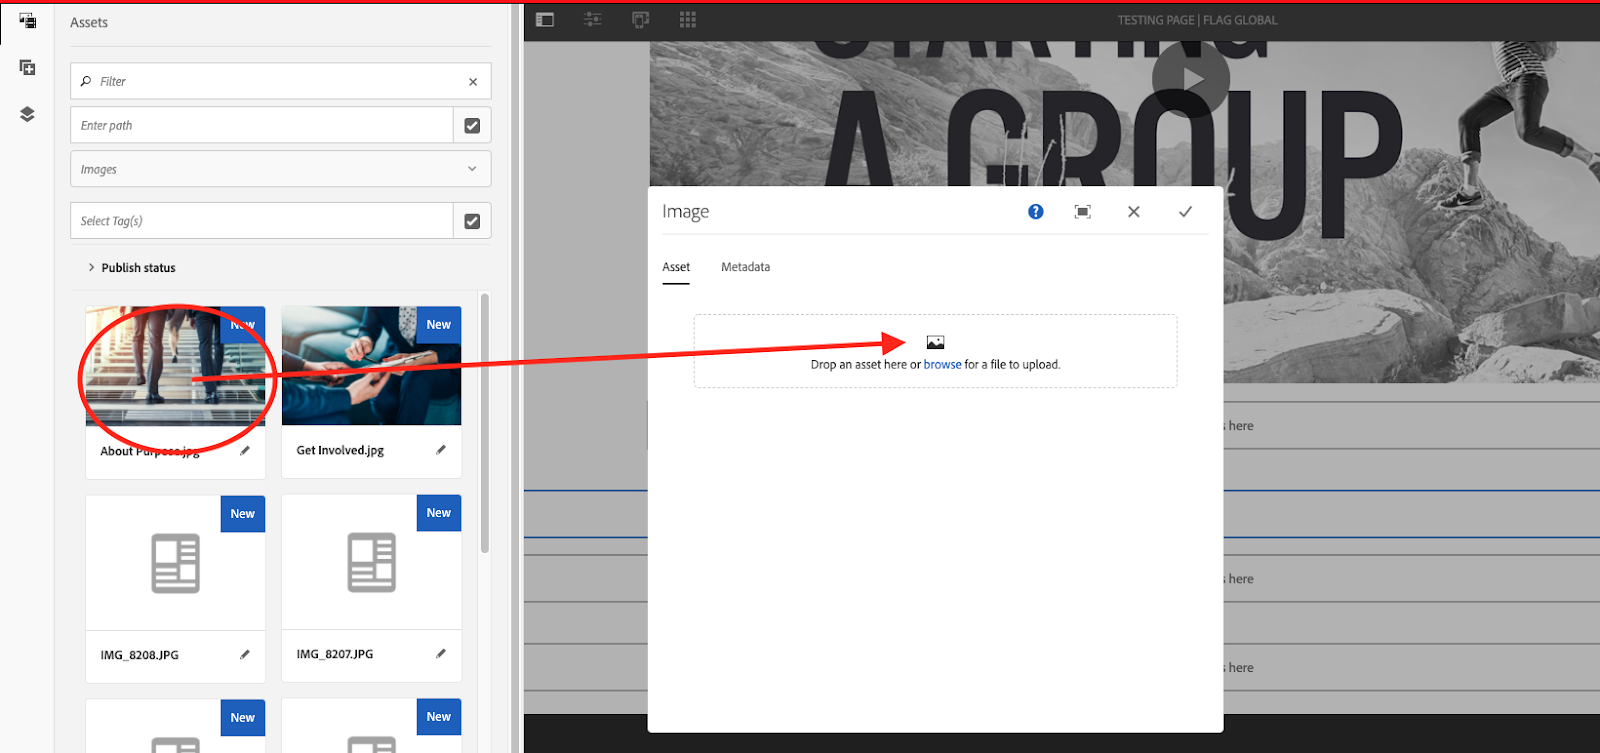
Here are the steps taken to attach an image to this component:
Click on the configure icon when you have the Image component selected. It is the wrench icon in the above image.
Now, you are able to drag an image from the Asset section in the side rail.
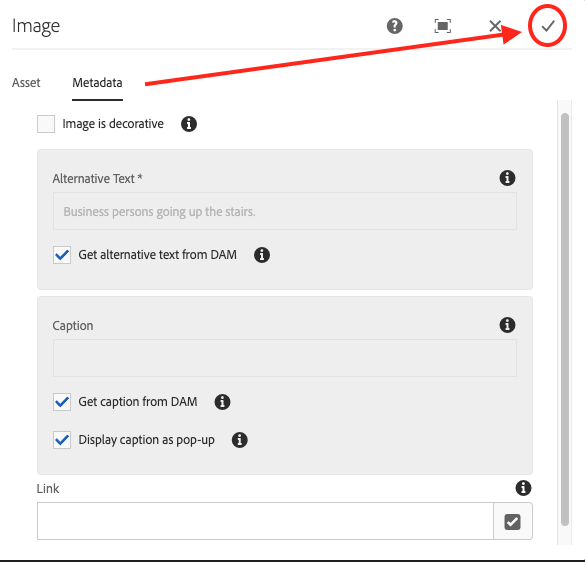
3. Once you have an image associated with the component, you can go to the next tab ‘Metadata’. You may look through each of them and decide whether you want to fill out the options, it is not necessary, but is recommended for SEO purposes to fill out some of the alt text. Once you are satisfied with the results, click the checkmark to Confirm.
4. It is recommended that you crop the image to the proper dimensions before putting it inside AEM. While AEM makes adjustments, if the dimensions, or the image size is too large, it will attempt to render a large quantity of the image, which can result in a blown out image. The below is a result of the image not being cropped before it is put in AEM.
©1994-2022 Cru. All Rights Reserved.