You want to be effective in digital ministry. Set SMART goals. (Specific, Measurable, Achievable, Relevant and Timely).
How to create a persona, based on research, educated assumptions, and real experiences. to help you in digital ministry.
Best practices and key tips as you get started in the world of social media for ministry.
A content journey is taking your user through a digital journey, step-by-step, going from one call to action (CTA) to another.
Analytics can help you see where God is at work in people’s lives online, and evaluate the effectiveness of your digital efforts.
Final instructions for a new digital strategist.
This section provides training and resources to help you grow in your marketing capabilities.
Find playbooks for using and leading with analytics, webinars, and step-by-step guides for using our Cru analytics tools.
Find training and how-tos for managing your social media channels as well as running social media campaigns.
Find helpful resources to help you get started with Adobe Campaign and to run your first email campaign.
Cru supports two content management systems that can host your website: Adobe Experience Manager (AEM) and WordPress.
Find helpful resources to help you get started with the right Learning Management System (LMS) to fit your training needs.
Worksheets and diagrams to help you plan your strategy
What does THAT mean? Find the answer here!
Directory of the supported apps and sites we use for ministry
The Text component is one of the most used components, rightfully so. There are many components that enable text inherently, but on this document we will go over just the ‘text’ component itself. Many people have had questions regarding the restrictions put in place on the component itself, asking why it is not as configurable as something like Microsoft Word or WordPress text blocks. Part of the reason this component is restrictive in nature is to remain “on brand”. Some styling options may be selectable from the Style menu, but much of what you can do on the text component is within the Configure option.
Text options available to most sites:
Bold
Numbered List
Italics
Bullet List
Increase/Decrease Indent
Link/Unlink
Paragraph formats
H2-H6
Quote
Line (───)
Preformatted
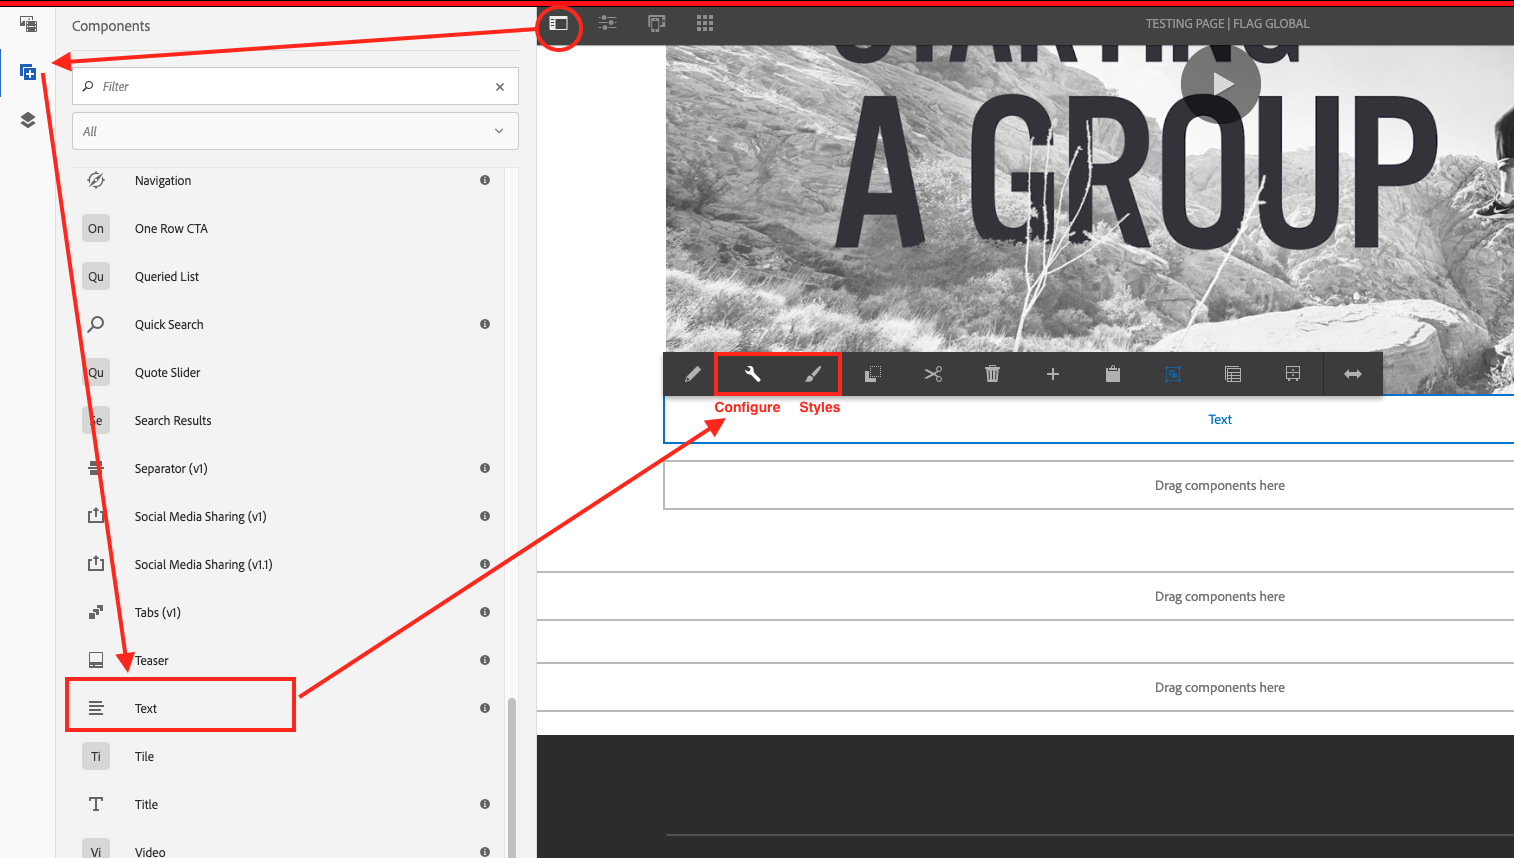
Here are the steps taken to add a text component to a page:
Open the side rail, and drag over the Text component. Or if you prefer, click on the area that says “Drag Component Here” and click “Insert New component”
Then click on the Configure icon
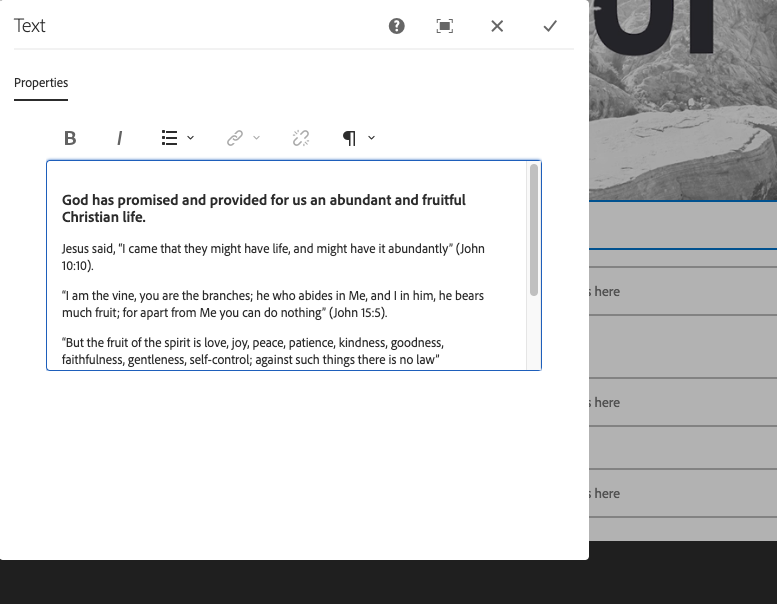
2. Once you bring up the Text editable menu, you can begin to add your content. For the purposes of this document, I took a piece from Cru.org and pasted it within the editor. You’ll notice that the Header is slightly bolded, know that the header is actually an H3 tag, and will render differently (larger) when viewing it as published. You can see which options are available for the component when adding text.
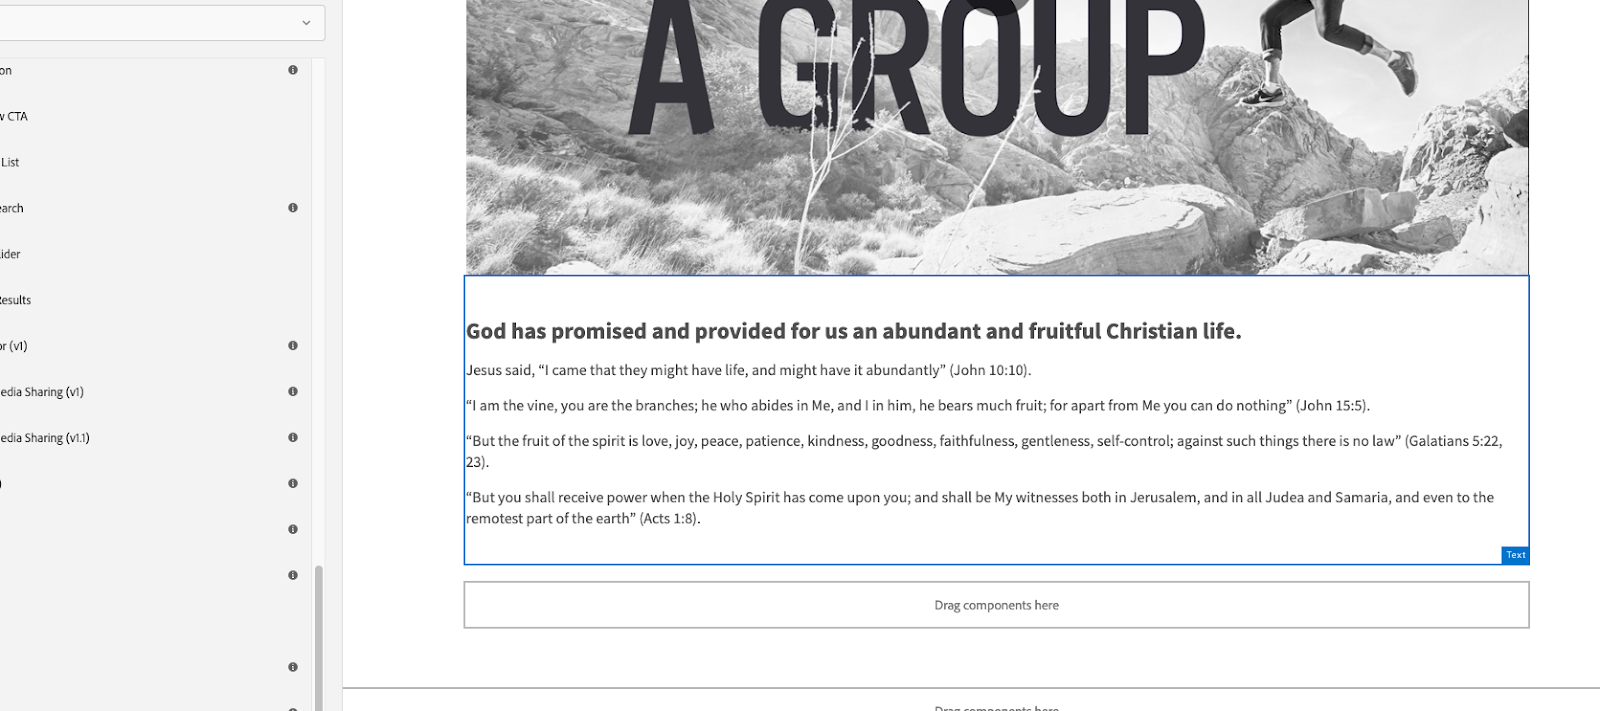
3. We recommend putting in manual padding most of the time. The text component does not have that built in, so the way around that is to put in an extra white space at the beginning and end of your text. That way, the components won’t be right next to on top of one another. This is what the component looks like, with extra padding at the beginning and end once you confirm by clicking on the check mark.
©1994-2022 Cru. All Rights Reserved.