You want to be effective in digital ministry. Set SMART goals. (Specific, Measurable, Achievable, Relevant and Timely).
How to create a persona, based on research, educated assumptions, and real experiences. to help you in digital ministry.
Best practices and key tips as you get started in the world of social media for ministry.
A content journey is taking your user through a digital journey, step-by-step, going from one call to action (CTA) to another.
Analytics can help you see where God is at work in people’s lives online, and evaluate the effectiveness of your digital efforts.
Final instructions for a new digital strategist.
This section provides training and resources to help you grow in your marketing capabilities.
Find playbooks for using and leading with analytics, webinars, and step-by-step guides for using our Cru analytics tools.
Find training and how-tos for managing your social media channels as well as running social media campaigns.
Find helpful resources to help you get started with Adobe Campaign and to run your first email campaign.
Cru supports two content management systems that can host your website: Adobe Experience Manager (AEM) and WordPress.
Find helpful resources to help you get started with the right Learning Management System (LMS) to fit your training needs.
Worksheets and diagrams to help you plan your strategy
What does THAT mean? Find the answer here!
Directory of the supported apps and sites we use for ministry

Adobe Experience Manager (AEM) allows you to upload a number of different file formats:
To see a full list of supported file types, please visit Adobe's documentation on the topic. The procedure for doing so is the same as described below.
If you are interested in using video or audio files in your site, please do not upload them to the DAM folder for your images. Contact aem@cru.org and we will assist you with this process.
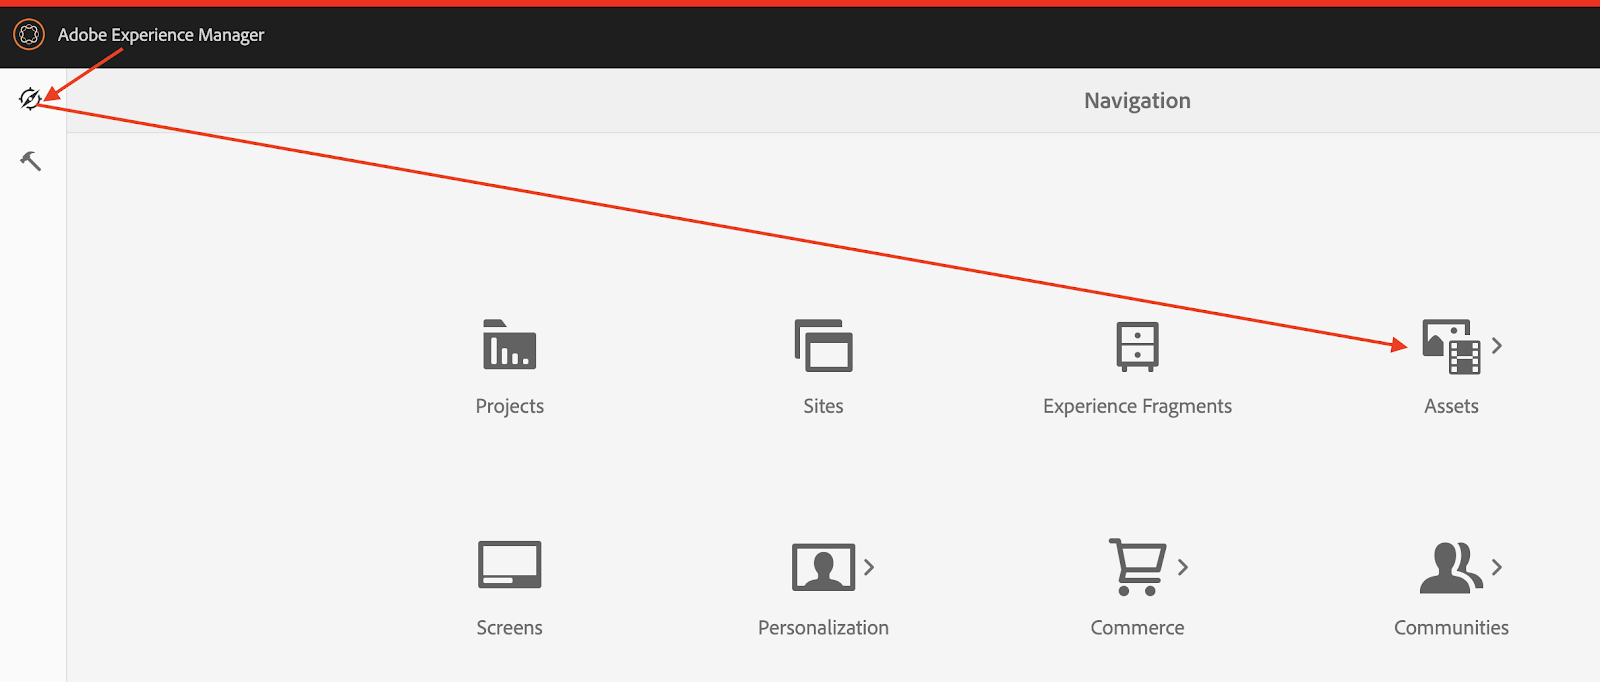
Clicking on the icon will bring you to another menu with a plethora of options. To get to the place where you can upload or edit an asset, click on the Files icon.
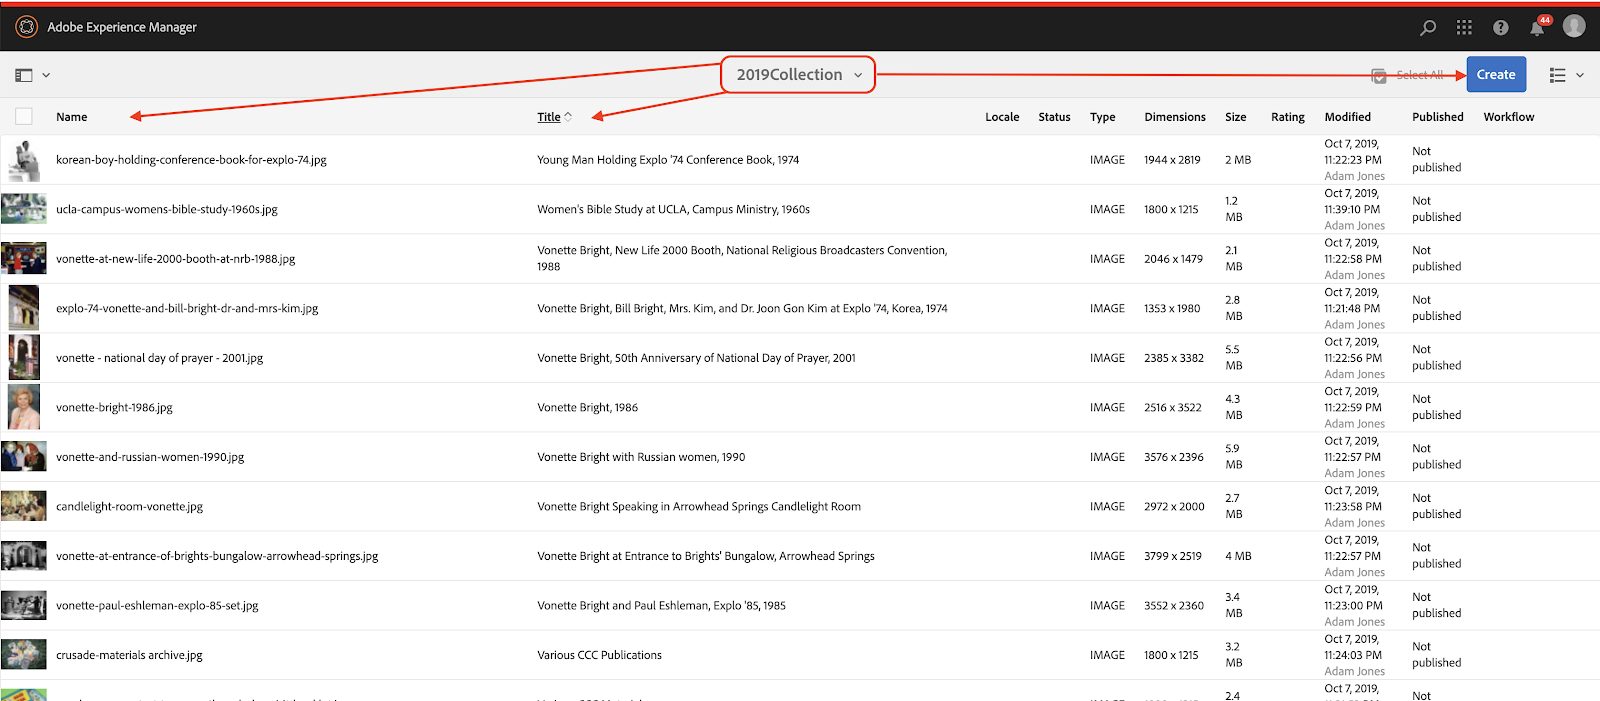
Once you go through to files, you will find that the files are separated by site. Clicking through deeper will dive into the subfolders where you can create, edit, delete, move assets.
One thing to keep in mind when you are going through the subfolders, is that there are several ways to get back up the chain. One way is to click on the drop-down where you see 2019Collection, it will reference higher levels in the hierarchy of folders.
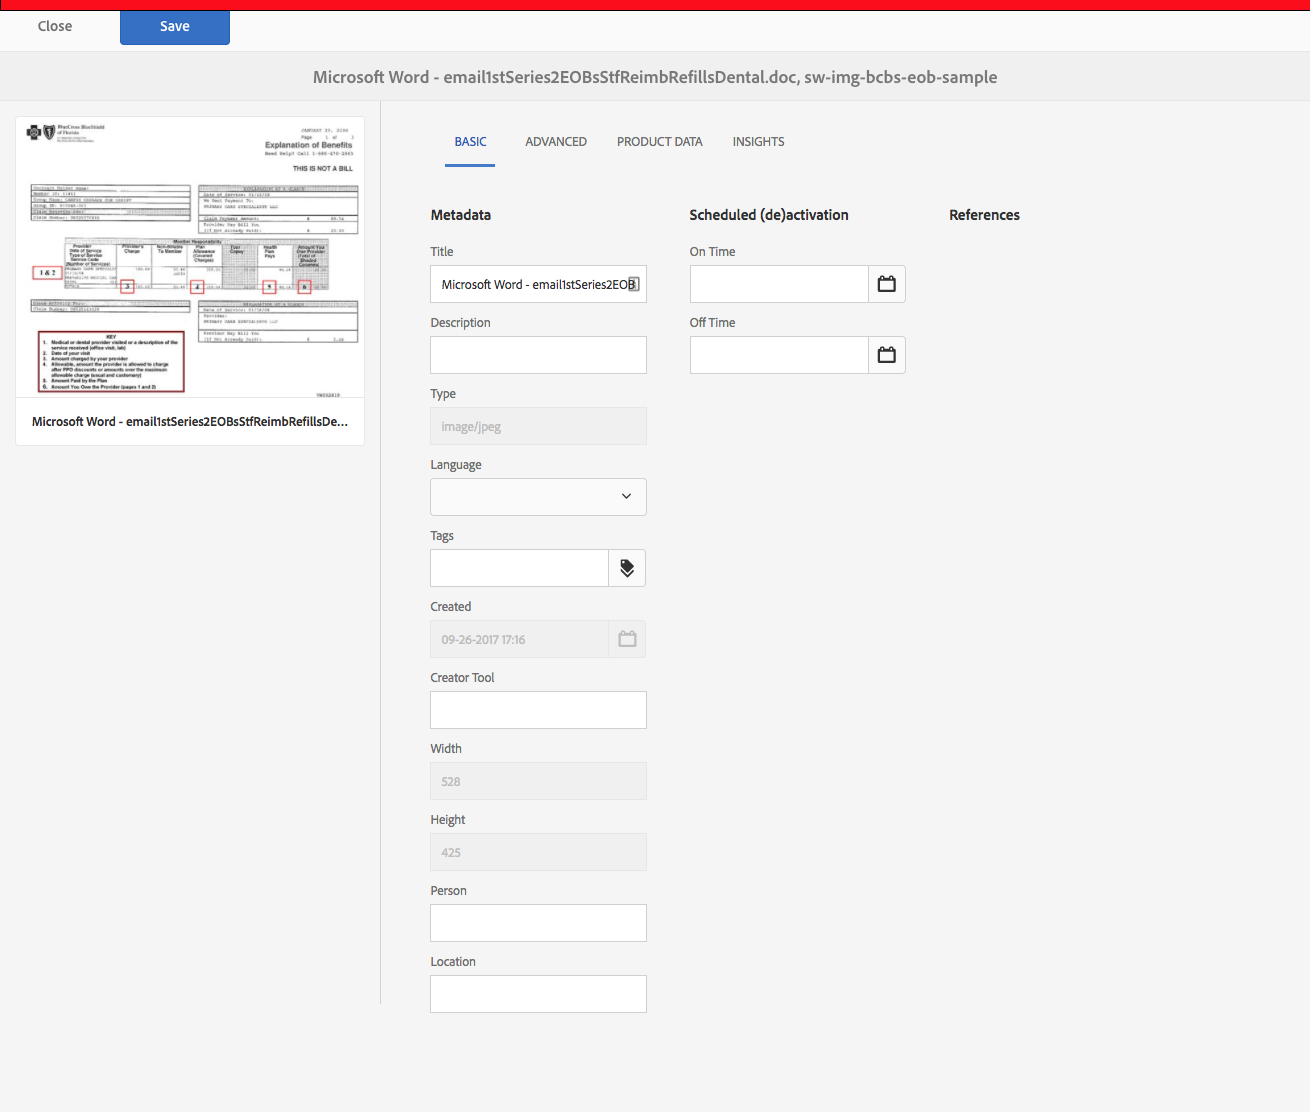
When you name an asset, you’ll see that you have the ability to give it a Title and a Name. The Name, is how it is stored in the DAM system (Data Asset Management).
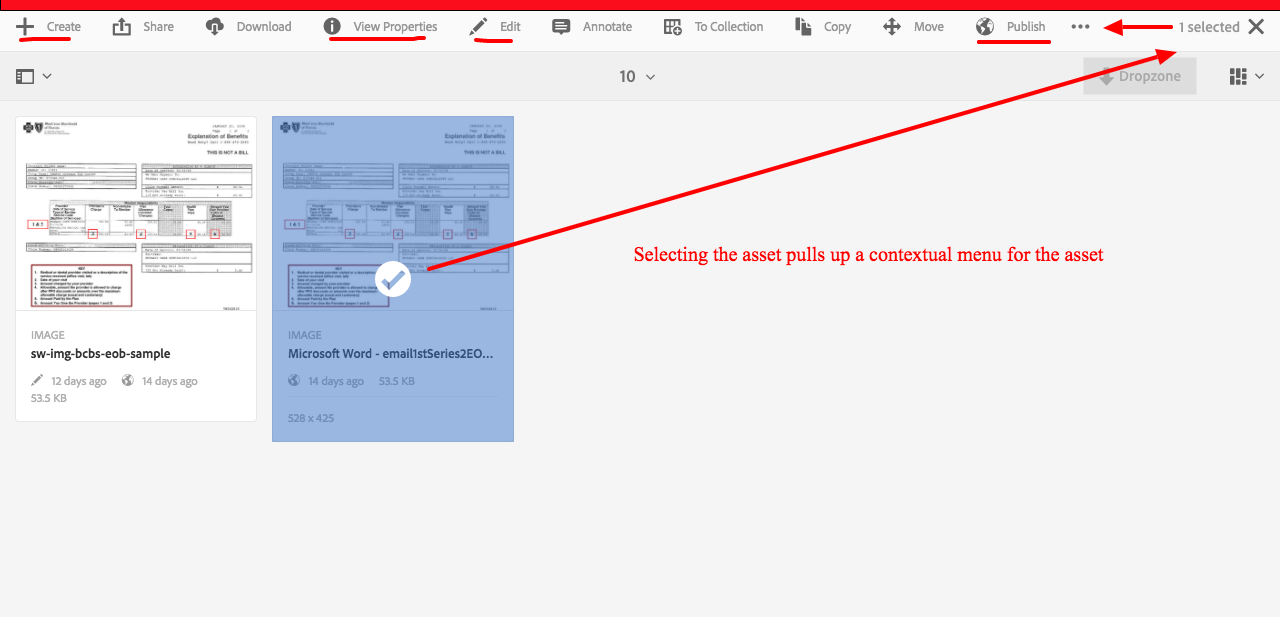
Clicking on the actual image of an asset brings up a list of other options on the top header bar. You can also view tiles by tiles or a list, by clicking the display option in the top right corner.
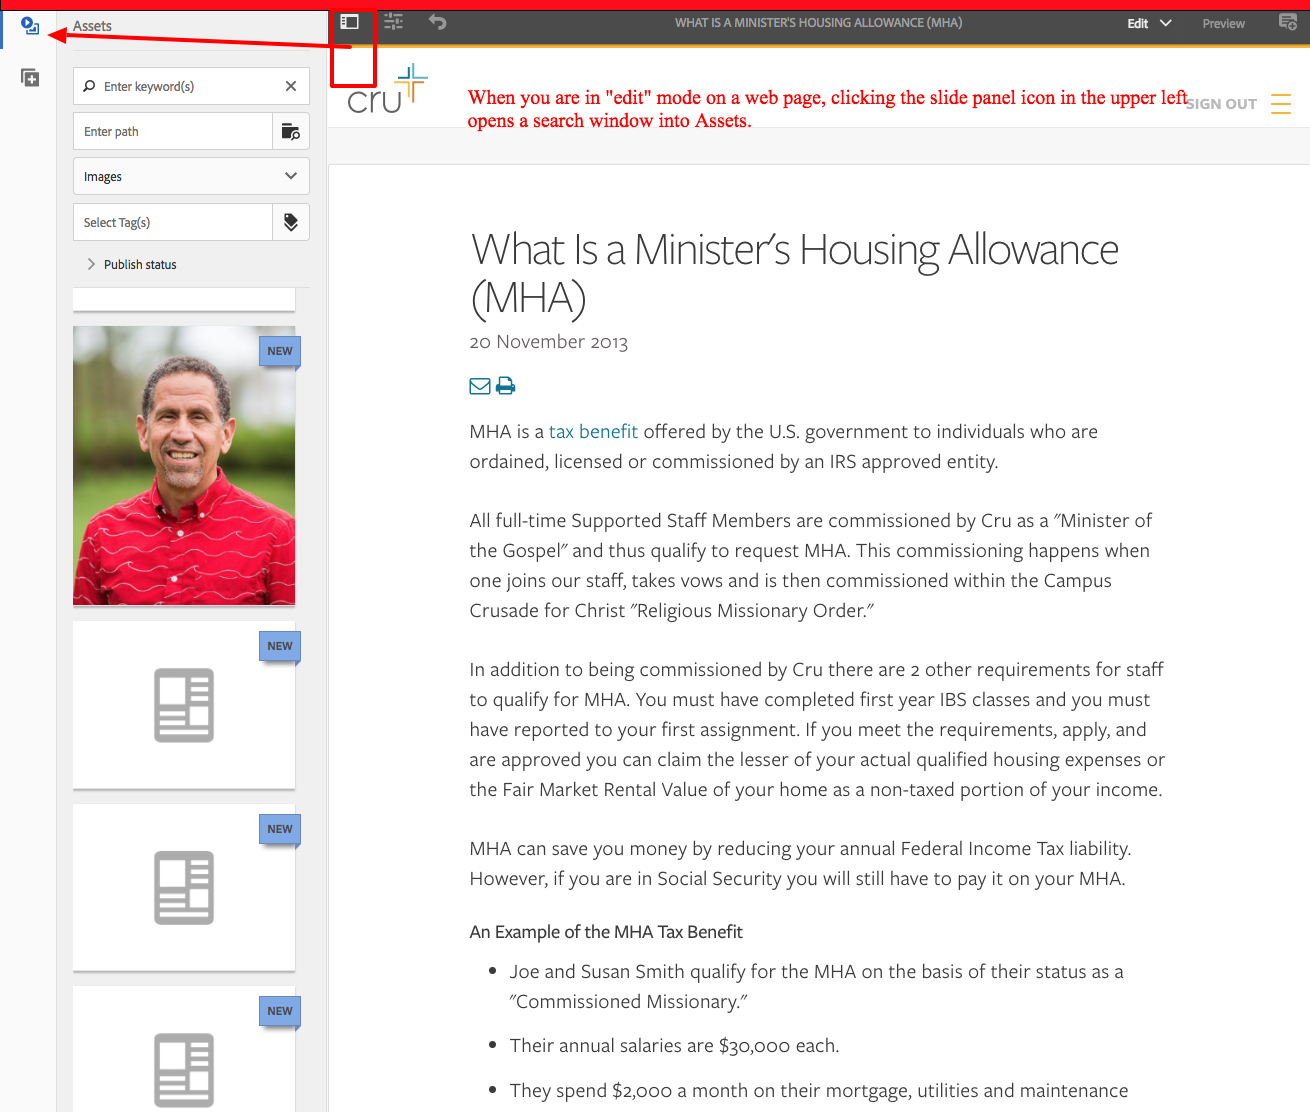
If you would like to add an image asset to a web page, you can do that from the edit screen within an actual page.
Need to know what the best dimensions are for uploading assets in AEM? Have a blurry picture but can't figure out why? Discover the solution and workarounds to these issues by exploring this article.
All digital assets, metadata and content of Microsoft Office and PDF documents are extracted and made searchable. Search allows sophisticated filtering on assets and fully respects the proper permissions.
Assets is a Digital Asset Management (DAM) tool that is fully integrated with the AEM platform and enables your enterprise to share and distribute digital assets. Users across an organization can manage, store, and access images, videos, documents, audio clips, and rich media such as Flash files for use on the web, in print, and for digital distribution.
©1994-2022 Cru. All Rights Reserved.